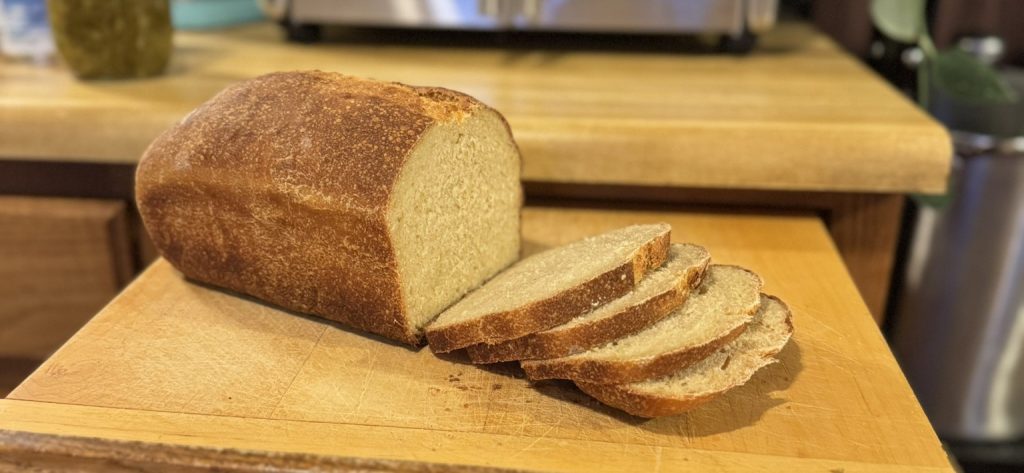
Enriched Sourdough Sandwich Bread
Kick your sourdough up a notch with this enriched sourdough sandwich bread recipe. The addition of milk, egg and honey leaves you with a soft, delicious loaf of bread.
How to make Enriched Sourdough Sandwich Bread
In a large bowl, whisk the sourdough starter into the warmed milk.
Whisk in the honey while the milk is still warm. This will help the honey dissolve nicely.
Add the egg and whisk to combine.
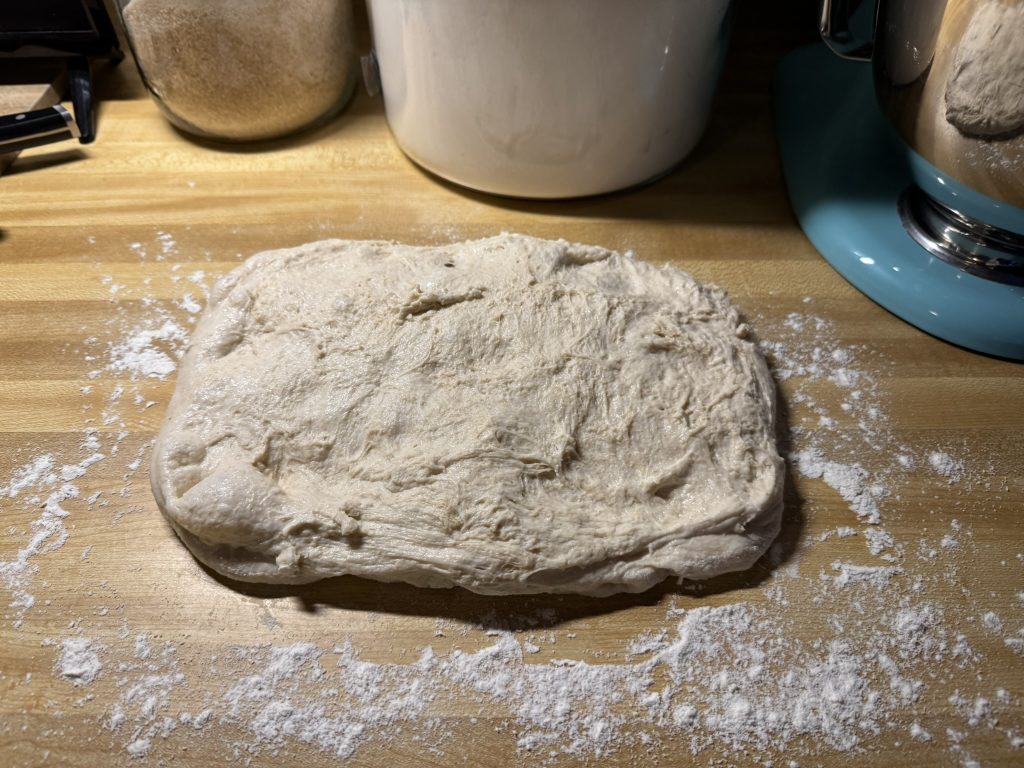
Pour the flour and salt into the wet ingredients and mix to combine. This will create a very shaggy dough. It may even seem dry, especially if you used any freshly milled flour. That’s okay.
Cover and let the dough rest for one hour. This process is called Fermentolyse. It is an important step especially if you used freshly milled flour. The bran in the flour will act like little knives, cutting right through any forming gluten strands if you try to work with it too soon. Allowing it to rest and hydrate will soften the bran.
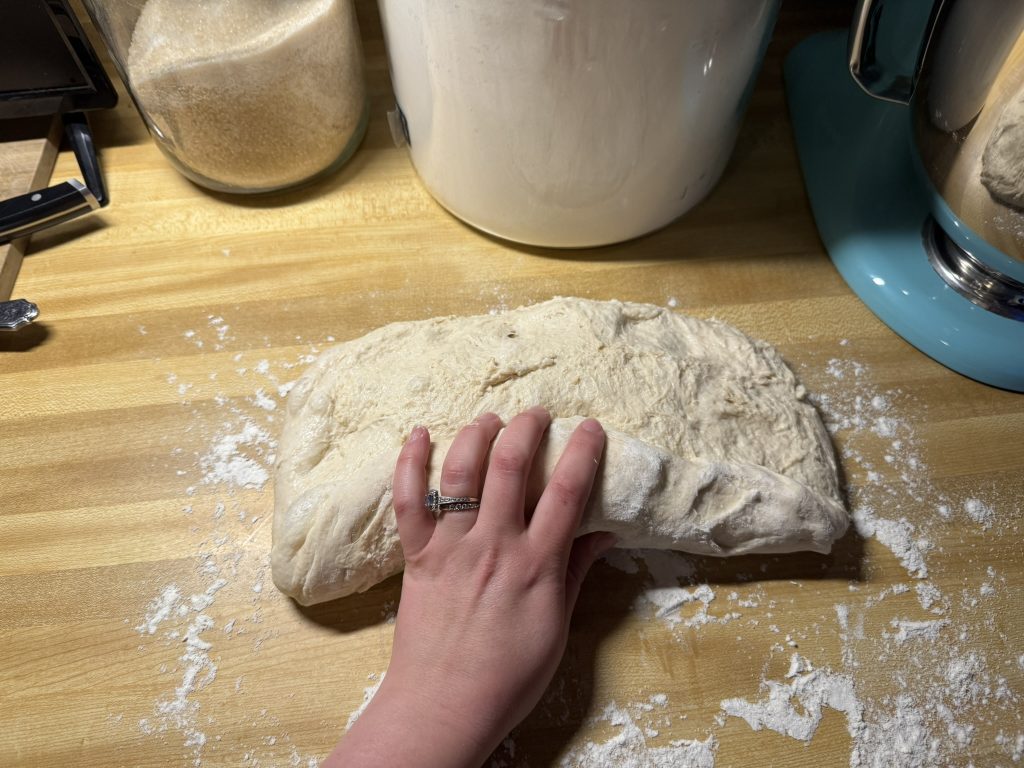
After the rest period, moisten your hands and perform the first set of stretch and folds. Hold one side of the dough down with one hand and stretch the other half up with the other hand. Fold it over itself. Rotate the bowl one quarter turn and repeat four total times, or until the dough has been rotated a full 360.
Cover and let the dough rest for 20 minutes in between each set of stretch and folds. You are doing four sets of stretch and folds total with 20 minutes between each.
After the four sets of stretch and folds have been completed, the bulk fermentation takes place. Leave the dough out to ferment until it has almost doubled in size. The amount of time it takes for this to happen depends on the ambient temperature of the area it is in. If the room is colder, it takes longer. If it is warmer, it will happen more quickly.
After the bulk fermentation is completed, you can place the bread in the refrigerator to cold proof. This process will further improve the health benefits and gives the bread a more sour flavor. Or you can bake the bread straightaway.
Regardless of whether you choose to cold proof or bake straightaway, once you are ready to bake, prepare a bread pan by either spraying it with non-stick cooking spray or by coating it in butter or oil. My personal preference is to coat it in coconut oil. This allows the finished bread to pop out easily each time.
Next, turn the dough out onto a floured surface.
Gently stretch the dough out into a rectangle, being careful not to deflate it too much.
Roll the dough up along the long side.
Once it’s rolled up, tuck the edges under.
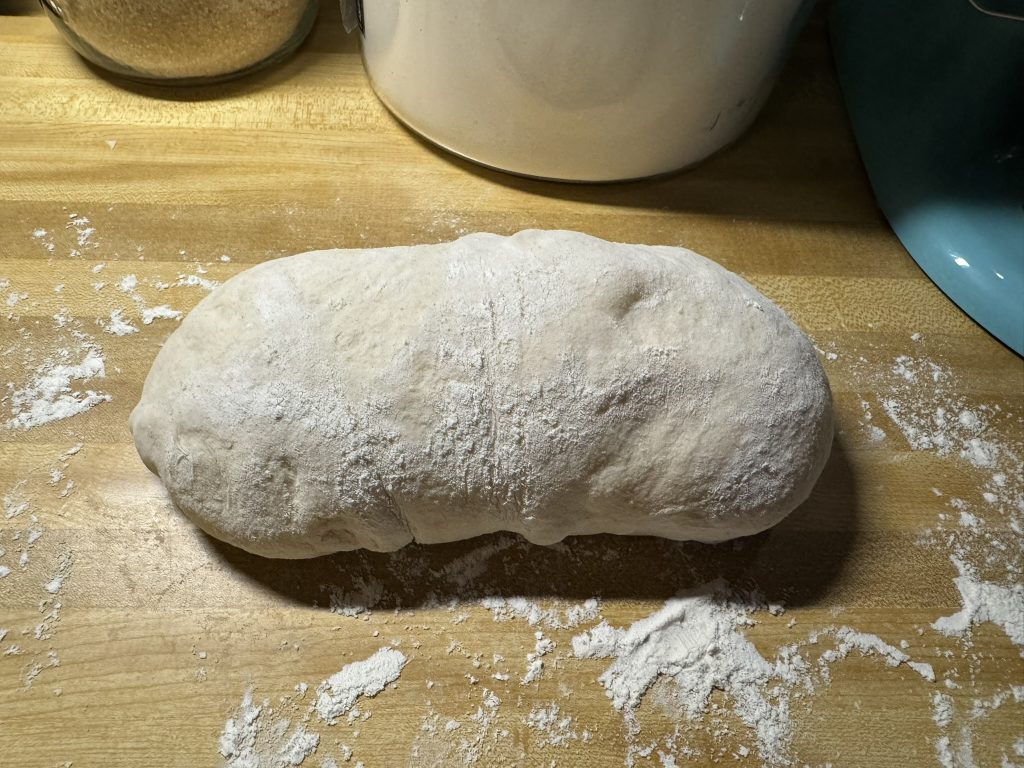
Transfer the bread dough to the prepared baking pan.
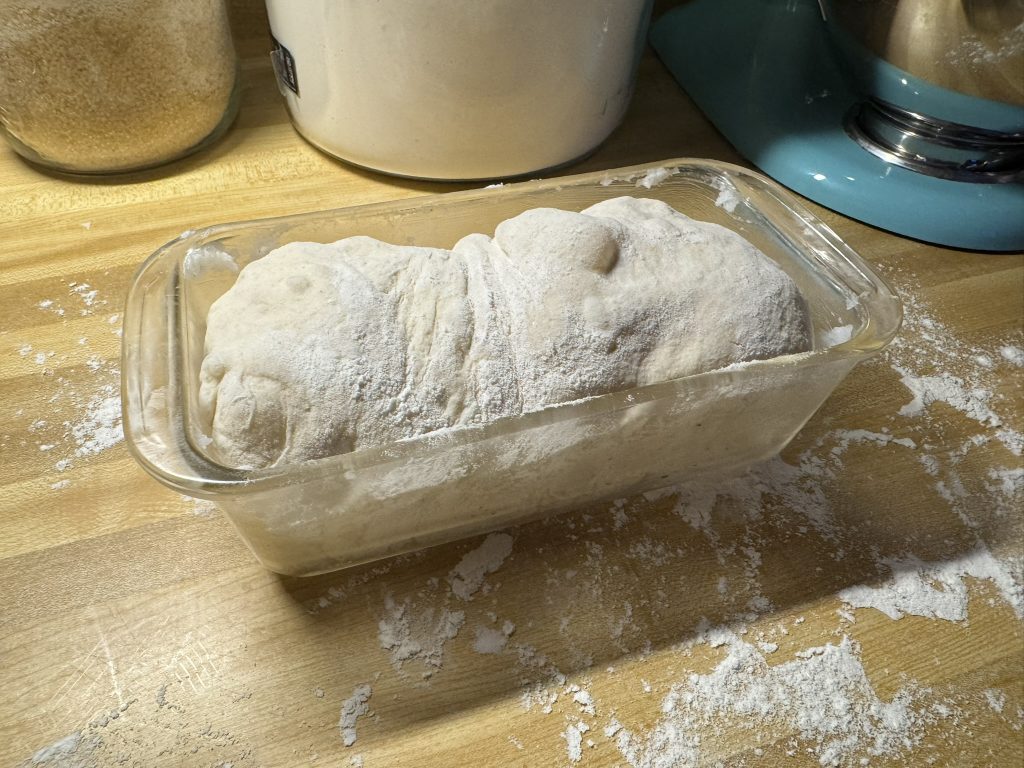
Cover the dough and let it rise until the top of the bread is even with the top of your baking dish. Leaving it in a slightly warmed oven will speed this along.
Preheat your oven to 425.
To create a “dutch oven effect” I place a second bread pan flipped upside down on top of the bread pan with the dough. This helps trap the steam and give the bread a good rise.
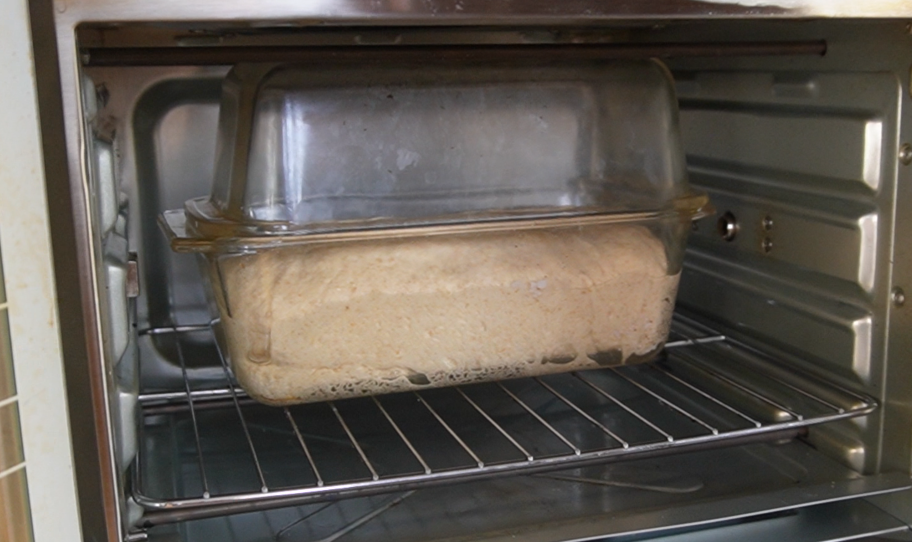
Bake at 425 with the second bread pan on top for 35 minutes.
Remove the second bread pan and bake for an additional 15 minutes. If the bread is getting too brown, cover it with foil.
I strongly suggest temping your bread to determine doneness by inserting an instant read thermometer to the middle of the bread. 195-205 results in a well-baked loaf of bread.
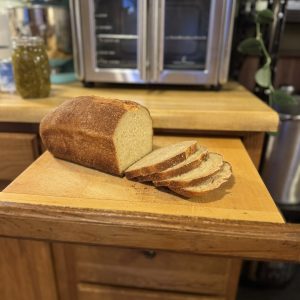
Lastly, when the bread is finished baking, immediately remove it from the baking dish, it should fall right out when you turn the baking dish over. If it doesn’t, experiment the next time you make it by preparing the baking dish with a different spray or oil. Allow it to cool on a bakers rack for one hour before cutting into it.
Enjoy your freshly baked enriched sourdough sandwich bread!
I baked this bread using my Emeril Lagasse French Door Air Fryer. Of course, it can be baked in a regular oven as well.
*As an Amazon Associate I earn from qualifying purchases.*
Enriched Sourdough Sandwich Bread
Ingredients
- 500 g flour I often use 200g freshly milled hard white wheat and 300g all purpose
- 350 g milk warmed
- 120 g active sourdough starter
- 1 egg room temperature
- 1 scoop honey
- 2 tsp salt
Instructions
- Begin by whisking the sourdough starter into the warmed milk.
- Add the honey while the milk is still nice and warm, whisk to dissolve.
- Add the egg and whisk to combine.
- Add the flour and salt to the wet ingredients and mix to combine. This will create a very shaggy dough.
- Cover and let dough rest for one hour.
- Moisten hands and perform the first of four stretch and folds. Hold one side of the dough down with one hand and stretch the other half up with the other hand. Fold it over. Rotate the bowl and repeat four total times, or until the dough has been rotated a full 360.
- Cover and let rest 20 minutes in between each stretch and fold. You are doing four sets of stretch and folds total with 20 minutes between each.
- After the four sets of stretch and folds have been completed, the bulk fermentation takes place. Leave the dough out to ferment until it has almost doubled in size. The amount of time it takes for this to happen depends on the ambient temperature. If the room is colder, it will take longer. If it is hotter, it will take less time.
- Once the bulk fermentation is completed, you can place the dough in the fridge to cold proof. This will further improve the health benefits and provides a more sour flavor in the bread. Or you can bake straightaway.
- Regardless of whether you choose to cold ferment or bake straightaway, once you are ready to bake, prepare a bread pan by either spraying with a non-stick spray or coating in butter or oil. I prefer coconut oil.
- Turn dough out onto a floured surface.
- Gently stretch the dough out into a rectangle.
- Roll the dough up along the long side and tuck the ends under.
- Transfer to your prepared bread pan.
- Cover and let it rise until the top of the bread is even with the top of your baking dish. Leaving it in a slightly warmed oven will speed this along.
- Preheat your oven to 425.
- To create a "dutch oven effect" I place a second bread pan flipped upside down on top of the bread pan with the dough. This helps trap the steam and give the bread a good rise.
- Bake with the second bread pan on top for 35 minutes.
- Remove second bread pan and bake an additional 15 minutes. If the bread is getting too brown, cover it with foil.
- I strongly suggest temping your bread to determine doneness by inserting an instant read thermometer to the middle of the bread. 195-205 results in a well-baked loaf of bread.
- Immediately remove from the baking dish and allow it to cool on a bakers rack for one hour before cutting into it.
- Enjoy!
For additional Sourdough Recipes, CLICK HERE!
Proudly powered by WordPress